2019 BGG rank #1805

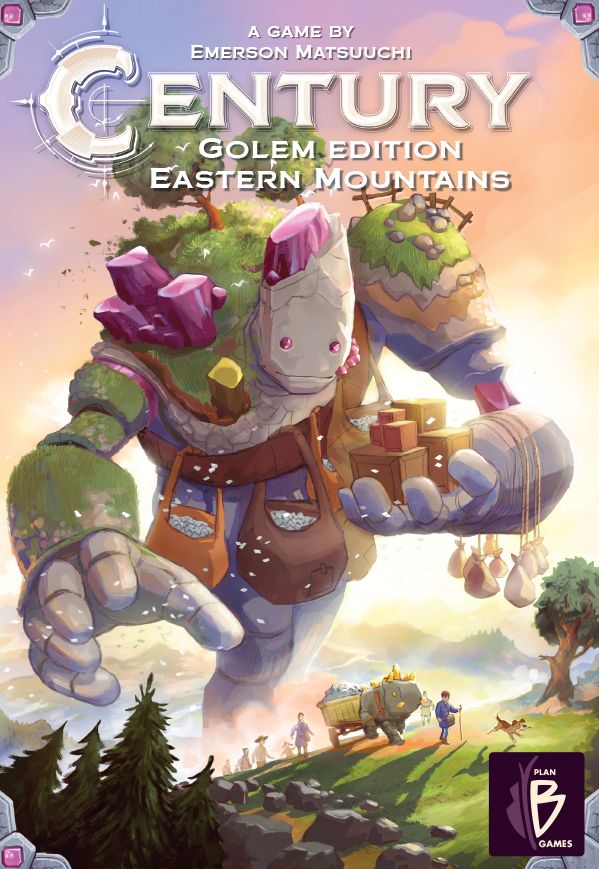
Century: Golem Edition – Eastern Mountains

2–4 players 30–45 min Ages 10+ 2.2/5 complexity 6.3/10 rating

About this game

Return to Carvania in the follow-up to Century: Golem Edition. In Century: Golem Edition – Eastern Mountains, players resume their roles as crystal traders and are now out exploring the Carvania mountain ranges and associated valleys seeking to establish a trade network. Century Golem: Eastern Mountains reimplements Century: Eastern Wonders but with vivid manga-inspired art. Explore the new gameplay elements and combine this game with Century: Golem Edition to play the unique game "The Call for Adventure."

What it feels like

Set Collection Pick-up and Deliver Contracts Grid Movement Point to Point Movement Modular Board Action Retrieval Fantasy

Explore these mechanics in Cardboard

Start an original prototype from reusable design patterns—not this game's content.

Open mechanics workbench

Game intelligence

Learn the game

100% knowledge coverage

Setup

1. Set up the game board according to the standard (multiplayer) rulebook for the chosen game mode (Normal, Sand to Sea, or Call to Adventure). 2. Lay out all bonus tiles, but remove the 6-point and 4-point victory bonus tiles and return them to the box. 3. The Automa does not use a player board. Place the Automa's outposts near the game board and place the Automa's ship on any board tile as its starting location. Set up your own player board as in a multiplayer game and place your ship on a board tile as your starting location. - In Call to Adventure mode only: Remove 4 outposts for both the player and the Automa, returning them to the box (each side uses only 16 outposts in this mode). 4. Give yourself starting gems/resources based on your chosen difficulty level (see Difficulty rules). 5. Build the Automa deck: a. Separate the 8 victory point tile cards from the Automa deck. b. Shuffle the remaining Automa cards and remove a number of cards based on difficulty, returning them to the box. c. Distribute remaining Automa cards into four piles so that the fourth pile has exactly 5 cards; distribute remaining cards among the first three piles. d. Shuffle the 8 victory point tile cards, select 4 at random without looking, and place one face-down on each pile. e. Shuffle each pile individually, then stack them: place the three larger piles on top of the smaller fourth pile. This combined stack is the Automa deck. f. For Normal Mode: ensure the deck is oriented so the Normal Mode text faces upright. g. For Sand to Sea / Call to Adventure Mode: FLIP the deck so the "Sand to Sea / Call to Adventure" text faces upright. 6. The human player always takes the first turn.

Turn flow

Each round consists of two turns: the human player's turn followed by the Automa's turn. PLAYER TURN: Take your turn exactly as you would in a standard multiplayer game — move your ship, place outposts, collect resources, and claim victory point tiles according to the base game rules. AUTOMA TURN: 1. Flip over the top card of the Automa deck. 2. Perform the actions shown on the card (movement and outpost placement as indicated). 3. Discard the card after resolving it. 4. The Automa never collects resources — if it lands on a tile containing a resource, discard that resource back to the supply. 5. If the Automa lands on the same tile you currently occupy, you receive 1 yellow resource from the supply, added to your player board. 6. If you end your own movement on a tile already occupied by the Automa, you must pay 1 resource to the supply. 7. In Normal Mode, ignore the action printed at the bottom of each Automa card (that section is for Sand to Sea / Call to Adventure mode only). In Sand to Sea / Call to Adventure mode, ignore the top action (that section is for Normal Mode). Always verify the deck is oriented correctly for your mode.

Scoring and victory

The human player's total points are compared against the Automa's total points after the end game is triggered. Highest score wins. Ties go to the Automa (player loses on a tie). Target score: Collect 4 victory point tiles to trigger end game; then score all sources. Scoring sources: Victory point tiles claimed during the game, Bonus victory point tiles claimed during the game, Outposts placed on the board (player) / Unplaced outposts (Automa), Gems remaining on the player's board (counted for Automa at Normal and Hard difficulties)

Source: Rulebook

Rules to know

The most useful rules for getting a first game right.

General

Solo game pits one human player against an automated Automa opponent; game ends when either collects their 4th victory point tile.

Century: Golem Edition – Eastern Mountains solo mode replicates the two-player experience using an Automa system. The game is played over a series of rounds, each consisting of a player turn followed by an Automa turn. The game ends immediately when either the human player or the Automa claims their fourth victory point tile, triggering final scoring.

Setup

Set up the board per the standard rulebook for the chosen game mode.

Set up the game board exactly as described in the standard Century: Eastern Wonders rulebook for your chosen mode (Normal, Sand to Sea, or Call to Adventure). This includes placing the modular board tiles, resource tokens, outpost pieces, and victory point tiles as directed.

Setup

Remove the 4-point and 6-point victory bonus tiles from play before starting.

Before play begins, lay out all bonus tiles but remove the 6-point and 4-point victory bonus tiles from the game entirely, returning them to the box. These tiles are never used in solo mode.

Setup

The Automa does not use a player board; place its outposts near the board and its ship on any starting tile.

The Automa opponent does not have or use a player board. Instead, place all of the Automa's outpost pieces near (but off) the game board as a supply. Place the Automa's ship token on any board tile to serve as its starting location. The human player sets up their own player board normally and places their ship on any board tile.

Setup

In Call to Adventure mode only, both the player and Automa each remove 4 outposts, leaving each with 16.

When playing in Call to Adventure mode, remove 4 outposts from the Automa's supply and 4 outposts from the player's supply, returning all 8 removed outposts to the box. Each side should have exactly 16 outposts for this game mode. This step does not apply to Normal or Sand to Sea modes.

Setup

Player receives starting gems based on chosen difficulty level.

At setup, the human player receives a number of starting gems (resources) determined by the chosen difficulty: NORMAL MODE: - Easy: 2 Green gems + 1 Yellow gem - Normal: 1 Yellow gem + 1 Blue gem - Hard: 2 Yellow gems + 1 Green gem SAND TO SEA / CALL TO ADVENTURE MODE: - Easy: 2 Green gems + 1 Yellow gem - Normal: 1 Yellow gem + 1 Blue gem - Hard: 2 Yellow gems + 1 Green gem The Automa receives no starting resources.

Setup

Build the Automa deck by removing VP tile cards, culling cards by difficulty, distributing into four piles, inserting VP cards, and stacking.

Step-by-step Automa deck construction: 1. Remove all 8 victory point tile cards from the Automa deck and set them aside. 2. Shuffle the remaining Automa cards. 3. Remove a number of cards based on difficulty (see difficulty rules) and return them to the box. 4. Distribute the remaining Automa cards into four piles/stacks such that the fourth pile has exactly 5 cards. Distribute any leftover cards into the first three piles. 5. Shuffle the 8 victory point tile cards and randomly select 4 (without looking). Place one selected VP tile card on top of each pile. 6. Shuffle each of the four piles individually (so the VP tile card is integrated randomly within each pile). 7. Stack the four piles into one deck by placing the three larger piles on top of the smaller fourth pile. 8. Orientation: For Normal Mode, the deck should be oriented with 'Normal Mode' text upright. For Sand to Sea / Call to Adventure mode, FLIP the entire deck so the 'Sand to Sea / Call to Adventure' text is upright. The correct orientation determines which half of each card's actions are used.

Setup

Normal Mode deck sizes: Easy removes 1 card (3×11, 1×6); Normal removes 4 cards (3×10, 1×6); Hard removes 7 cards (3×9, 1×6).

In Normal Mode, after separating the 8 VP tile cards from the Automa deck, remove the following number of Automa cards by difficulty before distributing: - Easy: Remove 1 card → results in 3 stacks of 11 cards and 1 stack of 6 cards. - Normal: Remove 4 cards → results in 3 stacks of 10 cards and 1 stack of 6 cards. - Hard: Remove 7 cards → results in 3 stacks of 9 cards and 1 stack of 6 cards.

Strategy briefing

Maximize outpost placement to deny Automa scoring

The Automa scores points for each outpost it does NOT place on the board. Aggressively placing your own outposts on high-value tiles and racing to contest key locations can slow the Automa's board presence, but note that its unplaced outposts still score — so the Automa benefits from NOT placing. Your goal is to outscore it on VP tiles and bonuses, not necessarily to block its outpost scoring.

Avoid ending movement on the Automa's tile

Every time you end movement on the Automa's current tile, you lose 1 resource as a penalty. Over many turns this attrition is significant. Plan movement paths to land on empty tiles or tiles the Automa has already vacated.

Exploit Automa tile-sharing bonus for yellow gems

When the Automa moves onto your tile, you gain a free yellow gem. Yellow gems are valuable resources. If you can predict the Automa's movement (based on remaining cards) or are parked on tiles it frequently passes through, you can farm this bonus.

Minimize leftover gems on your board at higher difficulties

At Normal and Hard difficulties the Automa gains bonus points for yellow (and green at Hard) gems left on your player board at game end. Spend or convert these gems before the game ends to deny the Automa those points. This is especially important in the final rounds once you see the endgame approaching.

Track the Automa deck to anticipate VP tile claims

The 4 VP tile cards are embedded at known depths within the four deck piles (one per pile). As you progress through the deck, you can roughly estimate when the next VP card will appear and race to secure a VP tile before the Automa's card triggers.

Choose difficulty to adjust deck size and Automa speed

Fewer cards in the Automa deck (higher difficulty, more cards removed) means the VP tile cards surface faster, compressing the game and reducing time to react. Conversely, on Easy difficulty the deck is larger, giving you more breathing room between Automa VP claims.

Ties are losses — play to win by at least 1 point

Because ties go to the Automa, you cannot afford to simply match the Automa's score. Always aim for at least a 1-point margin of victory. This makes every bonus tile and every gem conversion matter.

Common questions and edge cases

What happens if both the Automa and the player are on the same tile at the same time — does the effect trigger for both directions?

The effects are one-directional and depend on who moved last. If the Automa moves onto the player's tile: the player gains 1 yellow resource. If the player moves onto the Automa's tile: the player pays 1 resource. These are separate events triggered separately on each side's turn. If both are on the same tile at the start of a turn due to a prior resolution, no additional effect triggers unless movement occurs again.

The Automa moves onto a tile that has a resource token on it. Does the Automa keep the resource?

No. The Automa never collects resources. Any resource token on the tile the Automa lands on is immediately discarded back to the general supply. The Automa gains no benefit from resource tiles.

An Automa card directs the Automa to claim a specific victory point tile, but that tile has already been taken. What happens?

The Automa claims the next available (unclaimed) victory point tile going clockwise from the closed/taken tile. It continues clockwise until it finds an unclaimed tile and claims that one instead.

Which gems on my player board count against me (scored for the Automa) at game end?

This depends on game mode and difficulty. In Normal Mode Easy: no gems count. In Normal Mode Normal: only Yellow gems count (1 point each for Automa). In Normal Mode Hard: Yellow AND Green gems count (1 point each for Automa). In Sand to Sea/CTA Easy: no gems count. In Sand to Sea/CTA Normal: only Yellow gems count. In Sand to Sea/CTA Hard: Yellow AND Green gems both count.

How does the Automa score outposts — is it for outposts placed on the board or outposts NOT placed?

The Automa scores points for outposts that were NOT placed on the game board (remaining in its supply at game end). Each unplaced outpost scores 2 points (Normal Mode all difficulties) or 2–3 points (Sand to Sea/CTA depending on difficulty). This is the inverse of how the player scores outposts.

I accidentally used the wrong side of the Automa card for my game mode. How do I tell which side to use?

Normal Mode uses the standard top-side actions on each card (deck oriented with Normal Mode text upright). Sand to Sea / Call to Adventure mode uses the flipped orientation — the entire deck is physically flipped so 'Sand to Sea / Call to Adventure' text is upright. In Normal Mode, ignore the action at the bottom of the card. In Sand to Sea/CTA mode, ignore the action designated for Normal mode. Always verify deck orientation at setup.

What happens to the 4 victory point tile cards that are not selected during Automa deck construction?

Only 4 of the 8 VP tile cards are randomly selected and seeded into the Automa deck (one per pile). The remaining 4 VP tile cards are not used and should be set aside or returned to the box. They play no role in the game.

In Call to Adventure mode, do I remove 4 outposts total (split between me and Automa) or 4 outposts each?

Each side removes 4 outposts. The player removes 4 from their own supply and the Automa removes 4 from its supply, for 8 total removed from the game. Both the player and Automa should each have exactly 16 outposts remaining for the game.

Ask About This Game

Similar games