2016 BGG rank #3754

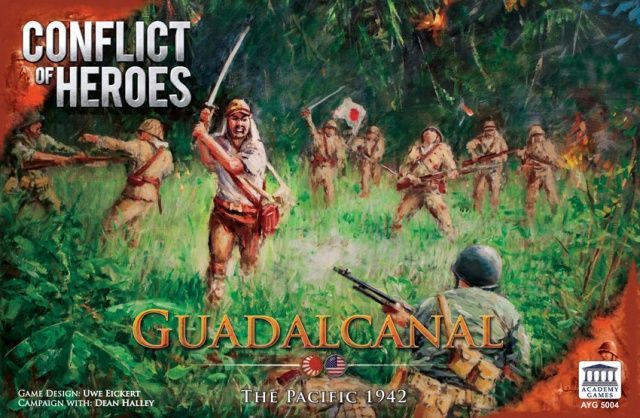
Conflict of Heroes: Guadalcanal – The Pacific 1942

2–4 players 60 min Ages 12+ 3.1/5 complexity 5.9/10 rating

About this game

In 1942, the Japanese empire exploded across the Pacific, conquering everything before them. The only large land mass still held by the Allies was Australia, which they desperately needed as a staging area for a planned U.S. led counter-attack. The Japanese knew of the importance of Australia, but lacked the resources to conquer it, so they decided on the next best thing: Isolate Australia from the United States by building an airfield on the island of Guadalcanal, from which planes could disrupt the Allied supply lines. The United States, ill-prepared as it was for any offensive actions, immediately attacked with the 1st Marine Division under the command of Major General Alexander A. Vandegrift, caught the Japanese by surprise and easily took control of the airfield. The Japanese 17th Army, under the command of Lt. Gen. Harukichi Hyakutake, counterattacked with an ever-increasing number of troops. For the next four months a titanic struggle took place in the air, on land and on sea as the isolated Marines and U.S. Army fought for their lives to hold their tiny perimeter around the airfield against the might of the Japanese Empire. Conflict of Heroes: Guadalcanal – Pacific Ocean 1942 recreates this struggle on your tabletop and includes gorgeous beach and jungles maps of the South Pacific, amphibious landing craft, the USMC, Japanese Banzai Charges, night combat, and much more.

What it feels like

Hexagon Grid Modular Board Dice Rolling Action Points Wargame World War II

Explore these mechanics in Cardboard

Start an original prototype from reusable design patterns—not this game's content.

Open mechanics workbench

Game intelligence

Learn the game

100% knowledge coverage

Setup

Firefight 7 – Costly Encounter Setup: 1. Identify the scenario: Firefight 7 – Costly Encounter. 2. Assign Player Command to the U.S. side. The Japanese side is controlled by the AI. 3. Set Round 1 Initiative to the U.S. 4. Set the U.S. CAP (Command Action Points) Allocation to 7 per Round. 5. Set Beginning Victory Points to 1 for the U.S. 6. Prepare the Japanese AI Action and Bonus Cards: use cards 2–13 and 30. 7. Prepare the Order Card deck using Order Cards 3–43. 8. The U.S. player receives 1 card in Round 1 and 1 additional card at the start of each subsequent Round. 9. Place the Japanese machine gun unit inside the bunker on the appropriate map hex. 10. Place the U.S. Control Marker and Japanese Control Marker on their designated starting positions. 11. Place Mission Objective markers as indicated by the scenario map, including Victory Hex H3-17. 12. Reinforce according to the Mission Order Card (Round 1: Start Mission – Reinforcements enter).

Turn flow

The game is played over a series of Rounds, each consisting of alternating activations and AI-driven Order Card actions. Each Round proceeds as follows: 1. **Initiative**: The side with initiative acts first (U.S. has initiative in Round 1 of Firefight 7). 2. **CAP Allocation**: The U.S. player receives their CAP allocation (7 per Round in Firefight 7) to spend on unit actions. 3. **Card Draw**: The U.S. player draws 1 card per Round (including Round 1). 4. **Order Card Resolution**: The current Round's Order Card is revealed and its special instructions are followed (e.g., Swift Action, Scout Teams, Advance, Autorally, Command Exp). 5. **AI Actions**: The AI executes actions according to its Order Card instructions — moving, firing, rallying, or drawing from the Draw Cup — targeting U.S. units or Mission Objectives per the Mission Orders and Counteractions tables. 6. **Player Actions**: The U.S. player spends CAPs to activate units for movement, fire, and other actions. 7. **Scoring**: On Rounds 5, 9, and 13, all sides score Victory Hex H3-17. 8. **End of Round**: Proceed to the next Round card. On Round 16 (End of Mission), final scoring and victory determination occur.

Scoring and victory

Victory conditions are evaluated at End of Mission (Round 16) in a strict priority order: Japanese Major Victory first, then U.S. Major Victory, then Minor Victory, then Draw. During the mission, Victory Hex H3-17 is scored on Rounds 5, 9, 13, and 16. Scoring sources: Control of Victory Hex H3-17 (scored on Rounds 5, 9, 13, and 16), Control of the Control Marker at End of Mission (Japanese Major Victory), Casualty differential at End of Mission (U.S. Major Victory if Japanese have 3+ more casualties), Casualties comparison for Minor Victory

Source: Rulebook

Rules to know

The most useful rules for getting a first game right.

Resource management

The U.S. player receives 7 CAPs per Round to spend on unit actions.

In Firefight 7, the U.S. player is allocated 7 Command Action Points (CAPs) per Round. CAPs are spent to activate and perform actions with U.S. units, such as moving or firing. Unspent CAPs do not carry over between Rounds.

Turn structure

The U.S. side has initiative in Round 1, determining who acts first.

In Firefight 7, the U.S. side holds initiative in Round 1. The side with initiative activates first each Round. Initiative may shift based on scenario rules or card effects in subsequent rounds.

Drawing

The U.S. player draws 1 card in Round 1 and 1 card at the start of each Round thereafter.

The U.S. player receives 1 Action or hand card in Round 1. At the beginning of each subsequent Round, the U.S. player draws 1 additional card. These cards may provide special actions, bonuses, or options during the player's turn.

Card play

The Japanese AI is driven by Order Cards 3–43 and Action/Bonus Cards 2–13 and 30.

The Japanese side is controlled by an AI system. Japanese AI actions are determined by Order Cards (deck built from cards 3–43) resolved each Round, and Action/Bonus Cards (cards 2–13 and 30). Each Round's Order Card dictates specific AI behaviors such as movement, firing, rallying, or special events.

Setup

In Round 1 (Start Mission), reinforcements enter the map.

The Order Card for Round 1 is labeled 'Start Mission.' When this card is resolved, reinforcing units enter the map according to the scenario's reinforcement rules. Both sides' starting forces are deployed at this point.

Scoring

On Rounds 5, 9, and 13, all sides score Victory Hex H3-17.

At the end of Rounds 5, 9, and 13, all sides score Victory Hex H3-17. The side that controls H3-17 at the moment of scoring gains the associated victory points. This hex is scored three times during the mission.

Special

Round 6 Swift Action: The AI performs 2 Order Card Actions in a row, drawing a new Order Card for the second action. Then it is the Player's turn.

When the Round 6 Order Card (Swift Action) is resolved, the AI immediately performs 2 Order Card Actions consecutively. For the second action, a new Order Card is drawn to determine what the AI does. After both AI actions are completed, control passes to the U.S. player for their turn.

Special

Round 7 Scout Teams: Before playing the Order Card, reveal hidden Units within LOS and 3 hexes of the Control Marker.

Before the Round 7 Order Card (Scout Teams) is executed, all hidden Units that are within Line of Sight (LOS) AND within 3 hexes of the Control Marker are revealed. After this reveal step, the Order Card action is then played normally.

Strategy briefing

Managing Hidden Units Around Bushido Rounds

Bushido triggers on Rounds 4 and 8, removing 1 Command Order Card per hidden U.S. Unit. Consider revealing units before those rounds to preserve the Command Order Card pool. However, Scout Teams on Round 7 will force-reveal units within 3 hexes of the Control Marker anyway, so plan your positioning to keep key hidden units outside that radius heading into Round 7.

Timing Flank Maneuvers with Counteraction Awareness

Flanking a Japanese unit triggers a Counteraction fire with +2 CAP bonus, making it dangerous. Plan flanks when your unit has high cover or when the nearest AI unit is suppressed/hit, reducing the effectiveness of the Counteraction response.

Contesting the Control Marker Early

A Japanese-held Control Marker at End of Mission immediately results in a Japanese Major Victory, overriding all other conditions including casualty counts. Prioritizing control of the marker is therefore more important than attrition in the late game.

Scoring Victory Hex H3-17 at Key Rounds

Victory Hex H3-17 is scored on Rounds 5, 9, 13, and 16. Ensuring U.S. control of that hex at the end of each of those rounds accumulates points steadily. The AI's Mission Orders push it toward U.S. Control Markers, so be mindful not to let the AI threaten both H3-17 and your Control Marker simultaneously.

Neutralizing the Bunker Machine Gun

The Japanese machine gun in the bunker cannot move, making its position permanently fixed. This means you can plan flanking routes around it without fear of it repositioning. However, it can still fire, so approach from angles where its LOS is obstructed or use suppression to reduce its effectiveness.

Forcing AI Autorally with Round 10 Timing

Round 10 Autorally forces the hit AI closest to a U.S. Unit to use its action Autorallying instead of attacking. Engineering situations where multiple AI units are hit going into Round 10 means the AI wastes its activation on recovery rather than advancing or firing.

Applying Pressure During Swift Action Round

Round 6 Swift Action gives the AI two consecutive Order Card actions. Ensure your units are in defensible positions or behind cover before Round 6, as the AI will activate twice before the U.S. player can respond.

Common questions and edge cases

Rounds 4 and 8 both remove Command Order Cards via Bushido when U.S. units are hidden. Round 13 restores only 2. Can the removed cards exceed what Round 13 restores?

Yes. Bushido (Rounds 4 and 8) each remove 1 Command Order Card per hidden U.S. Unit, potentially removing many cards. Command Exp (Round 13) only restores 2 of those removed cards, regardless of how many were removed. Players should be aware that keeping many units hidden early will permanently thin the Command Order Card pool for most of the game.

On Round 11 or 15, the Advance Order Card instructs the unhit fresh AI closest to a U.S. Unit to move 2 hexes. Does the Japanese machine gun in the bunker qualify?

No. The Japanese machine gun inside the bunker is explicitly prohibited from performing Move actions while inside the bunker (Special Rule). Even if it is the closest unhit fresh AI unit to a U.S. Unit, it cannot be selected for the Advance action. The next eligible AI unit should be chosen instead, or the Order Card's fallback action is executed.

Round 7 Scout Teams reveals hidden units within LOS and 3 hexes of the Control Marker. Does this affect how many cards are removed if Bushido triggers on Round 8?

Yes, indirectly. If Scout Teams (Round 7) reveals U.S. hidden units, those units are no longer hidden. When Bushido resolves on Round 8, only U.S. Units that are still hidden at that moment cause Command Order Cards to be removed. Revealing units via Scout Teams therefore reduces the number of cards removed by Round 8 Bushido.

During Round 6 Swift Action, the AI draws a new Order Card for its second action. Is this new card consumed and removed from the deck?

Yes. The AI draws a new Order Card from the Order Card Deck for the second action during Swift Action. This card is used and resolved normally, consuming it from the deck just as any other Round's Order Card would be.

At End of Mission, the Control Marker is Japanese, but the Japanese also suffered 3 more casualties than the U.S. Which victory condition applies?

The Japanese Major Victory condition applies. Victory conditions are evaluated in strict priority order: Japanese Major Victory (Control Marker is Japanese) is checked first. If that condition is met, evaluation stops there and the result is a Japanese Major Victory, regardless of the casualty differential.

When does the AI use Counteractions versus Mission Orders?

Counteractions are triggered reactively by specific U.S. actions (e.g., a U.S. unit achieving a flanking position triggers the nearest AI to fire; a unit in the Draw Cup triggers a deployment). Mission Orders are the AI's standard proactive directives (highest FP AI near a Japanese Control Marker fires; AI near a U.S. Control Marker moves toward it). Both can apply in the same Round if triggering conditions are met.

Ask About This Game

Similar games