2009 BGG rank #21792

Darwinci

3–5 players 60 min Ages 9+ 2.4/5 complexity 5.5/10 rating

About this game

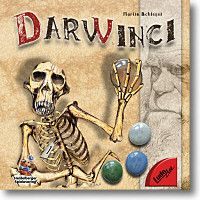
Darwinci is an auction game. Precious bones are beeing auctioned and the put together as creatures. Strategic and artistic skills are needed. Contents: 65 bone-tiles, 50 glass-beads, 25 jewelry marker, 5 Leonardo-angles, 1 die-bar, 1 Darwin-card, 60 darwin-marker

What it feels like

Tile Placement Pattern Building Auction / Bidding Evolution

Explore these mechanics in Cardboard

Start an original prototype from reusable design patterns—not this game's content.

Open mechanics workbench

Game intelligence

Learn the game

100% knowledge coverage

Setup

1. Each player receives four bone tiles: two are laid adjacent to each other as their starting terrain, and two are kept as their starting hand.\n2. Each player receives 9 small glass stones of the same color. One small glass stone is given to each neighboring player.\n3. Each player places one big glass stone on the Leonardo-Square to designate their color.\n4. Each player receives 12 Darwin.\n5. The youngest player starts the game and receives the turn counter.\n6. The player to the left of the starting player receives the Darwin tile.\n7. All remaining bone tiles are shuffled and formed into two face-down stacks.

Turn flow

Each round proceeds through the following steps:\n1. BUYING (optional): In turn, each player may buy two bone tiles for 3 Darwin, then must discard two bone tiles.\n2. SELECTION: Each player secretly selects one bone tile and places it face-down in front of them.\n3. REVEAL: All selected bone tiles are revealed simultaneously.\n4. BIDDING ROUND 1: The starting player opens the first bidding round. Each player MUST bid one or two of other players' stones onto bone tiles (one stone if they only have one other player's stone). They may also bid one of their own stones. Bidding proceeds clockwise.\n5. BIDDING ROUNDS 2 & 3: Each player may bid zero, one, or two stones (own or others') per round. The holder of the Darwin tile may bid one additional stone per round.\n6. RESOLUTION: The highest total bid on each tile wins it. The winner receives one of their own bid stones back; the rest of their stones go to the seller (tile's original player). All other players' stones return to their respective owners.\n7. TIE-BREAKING: In a tie, the tied player closest to the starting player (in turn order) wins.\n8. TURN COUNTER: The winner of the starting player's tile becomes the new starting player and takes the turn counter. If the starting player wins their own tile, the player to their left becomes the new starting player.\n9. PLACEMENT & SCORING: In turn, each winner places their won tile(s) in their terrain, pays rotten bones if required, and may initiate creature and/or jewel scoring.\n10. DRAW: Each player draws a new bone tile.\n11. DARWIN TILE: The player with the fewest bone tiles in their terrain receives the Darwin tile. Ties are broken clockwise.

Scoring and victory

The player with the most Darwin at the end of the game wins. In case of a tie, the player with the biggest creature wins. Scoring sources: Creature scoring: number of tiles in creature × number of appendages, Jewel scoring: sum of bone values of qualifying tiles in a row/column × count of chosen jewel in that row/column

Source: Rulebook

Rules to know

The most useful rules for getting a first game right.

Setup

Each player starts with two bone tiles placed adjacent to each other as their terrain.

At the start of the game, each player receives four bone tiles. Two of these are immediately placed adjacent to each other in front of the player, forming their starting terrain. The remaining two are kept in hand.

Setup

Each player gets 9 small glass stones of one color; one is given to each neighboring player.

Each player receives 9 small glass stones, all of the same color. One stone is given to each immediately neighboring player (left and right neighbors). These stones are used for bidding and represent player tokens that can be held by multiple players.

Setup

Each player places one big glass stone on the Leonardo-Square to mark their color.

Each player takes one big glass stone and places it on the Leonardo-Square. This designates the player's color for the game. In the standard variant, the big stone is purely a color marker and is not used in bidding.

Setup

Each player starts with 12 Darwin.

At the start of the game, each player receives 12 Darwin, which serve as the game's currency for buying tiles and as the scoring unit.

Setup

The youngest player starts and receives the turn counter; the player to their left receives the Darwin tile.

The youngest player is designated the starting player and takes the turn counter. The player immediately to the left of the starting player receives the Darwin tile at the start of the game.

Setup

Remaining bone tiles are shuffled into two face-down stacks.

After distributing starting tiles and hands, the remaining bone tiles are shuffled together and divided into two face-down draw stacks placed in the center of the play area.

Turn structure

Optionally, each player may buy two bone tiles for 3 Darwin, then must discard two bone tiles.

At the start of each round, in turn order, each player may choose to buy two bone tiles from the face-down stacks for a cost of 3 Darwin. If a player exercises this option, they must then discard two bone tiles from their hand (their choice). This step is optional — a player may skip it.

Turn structure

Each player secretly selects one bone tile and places it face-down.

After the buying phase, each player simultaneously and secretly selects one bone tile from their hand and places it face-down in front of them. This tile will be the tile up for auction this round.

Strategy briefing

Darwin Tile Management

Deliberately keeping fewer tiles in your terrain than opponents grants you the Darwin tile, which lets you bid one extra stone per round in bidding rounds 2 and 3. This bidding advantage can be decisive in tight auctions and is worth planning around early in the game.

Creature Design for Maximum Score

Creature score is tiles × appendages. Prioritize building creatures that are both large (many tiles) and have multiple appendages. A small creature with many appendages can outscore a large creature with few. Plan your terrain layout so creatures can grow freely before being closed off.

Jewel Scoring Timing

Jewel scoring requires an empty space in the chosen row or column. Score jewels before filling a row or column completely, or you permanently lose the ability to score that jewel in that line. Since each jewel can only be scored once per player, timing is critical.

Stone Economy in Bidding

In round 1, you are forced to spend others' stones (1 or 2), which effectively cycles stones to sellers. Spend opponents' stones on tiles you don't want, forcing those opponents to pay net Darwin to sellers, while saving your own stones for tiles you genuinely want.

Terrain Shape Planning

Because the terrain is capped at 3×4 or 4×3, plan your layout from the start. A wider terrain enables more jewel-scoring rows and columns, while a longer terrain can support longer, higher-scoring creatures. Placing tiles in poor positions is permanent and can block future high-value placements.

Endgame Racing

The game ends when anyone reaches 12 tiles. If you're ahead in Darwin, you may want to race to 12 to end the game before opponents can score. If you're behind, slow your own tile acquisition while triggering more creature/jewel scorings to close the gap.

Common questions and edge cases

What happens in bidding round 1 if a player only has one stone belonging to other players?

They must bid exactly that one stone. The rule requires bidding 'one or two' others' stones, but if only one is available, one is the mandatory bid.

Does the Darwin tile holder's bonus bid (+1 stone) apply in bidding round 1 as well?

The rulebook specifies the bonus only for the second and third bidding rounds. The Darwin tile holder does not gain an extra bid in round 1.

Who becomes starting player if the current starting player wins their own tile?

If the starting player wins their own tile, the player immediately to their left becomes the new starting player and takes the turn counter.

Can a player score a jewel in a completely filled row or column with no empty spaces?

No. Jewel scoring can only be performed before or after an empty space in the chosen row or column. A fully filled row or column without an adjacent empty position cannot be scored.

What counts as an appendage for creature scoring?

Appendages are the connecting endpoints of a creature's bones (e.g., skull, foot). A creature is complete when all connection points are closed. Each distinct appendage (e.g., one skull + one foot = 2 appendages) is counted for the scoring multiplier.

When a player wins a tile, which stone do they get back — their own or another player's?

The winner gets one of their own stones back. All of their other bid stones (own or others') that were on that tile go to the seller. Non-winning players' stones always return to their respective owners.

In the expert variant, if a player holds another player's big stone, when must it be bid?

Another player's big stone must be placed (bid) before any small stones when bidding. When winning a tile, the player receives a small stone back first, before any big stone.

Can a player place more than 12 tiles in their terrain?

No. The terrain is hard-limited to a 3×4 or 4×3 grid, for a maximum of 12 tiles. Reaching 12 tiles also triggers the endgame.

Ask About This Game

Similar games