1984 BGG rank #16776

Singapore

2 players 120 min Ages 12+ 2.4/5 complexity 5.5/10 rating

About this game

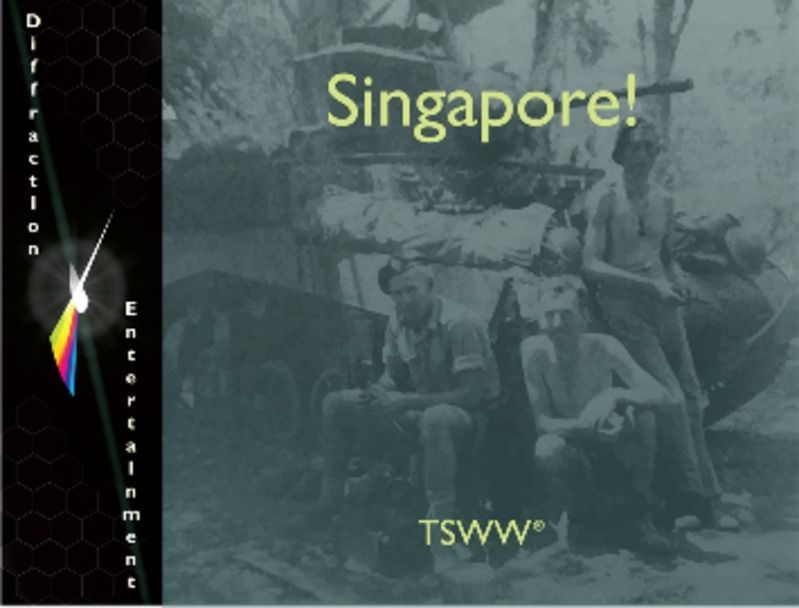
"Singapore" is a two-player wargame covering the Japanese invasion of British Malaya in World War 2. The game is operational in scale, with units representing brigades and regiments. The map sheet consists of two maps: a large-scale map of Malaya as well as a more detailed map of Singapore island. The earlier turns of the game take place on the larger Malayan map, and the play moves to the smaller Singapore map only towards the end of the game, when the Japanese prepare to assault the island. Game components consist of one map sheet, 100 counters, rules, and game charts. The game was originally published in Strategy & Tactics magazine (S&T) #96. Game Scale: "Each hexagon on the large map of the Malacca Peninsular represents an area 16 miles across. Each hex on the inset map of Singapore Island represents an area 3.4 miles across. Each Game-Turn represents one week of time. Each Assault Pulse represents 56 hours." (Source: Section 2.4 of the Rules (Game Scale)).

What it feels like

Simulation Hexagon Grid Grid Movement Dice Rolling Wargame World War II

Explore these mechanics in Cardboard

Start an original prototype from reusable design patterns—not this game's content.

Open mechanics workbench

Game intelligence

Learn the game

100% knowledge coverage

Setup

1. Unfold the map of the Malayan Peninsula and Singapore island. 2. The Commonwealth player sets up all Commonwealth units (British, Indian, Australian, Malay, Volunteer Force, and special units such as the 2 Royal Tank Regiment, 7 Hussars, and Kroh Column) in their historical starting hexes or holding boxes as indicated on the counter manifest. 3. The Japanese player sets up Japanese units in their designated starting positions in northern Malaya/Thailand. 4. Reinforcement counters (identified by turn number on the counter) are set aside to enter on the specified game turn. 5. Place destroyed/eliminated unit markers in the appropriate holding boxes (Destroyed, Penang Shipping Captured, Blocked This Turn). 6. Set the Game Turn marker to Turn 1 on the Game Turn track. 7. Determine which player moves first according to the scenario rules (Japanese player typically moves first).

Turn flow

Each game turn is divided into phases. The Japanese player activates units and conducts movement followed by combat (Assault phase and Pulse actions), then the Commonwealth player moves and fights in response. Units may be blocked for a turn as indicated by the 'Blocked This Turn' marker. Reinforcements arrive on their designated turns per the counter manifest. The Port status and Penang Shipping markers track key logistical events. Each turn represents a discrete period of the campaign, and the game ends either when Singapore falls (Japanese victory) or the campaign period expires (Commonwealth victory if Singapore holds).

Scoring and victory

The Japanese player wins by capturing Singapore before the final game turn. The Commonwealth player wins by preventing Singapore's fall through the end of the campaign. Intermediate results may be scored based on the game turn on which Singapore falls (or does not fall). Target score: Capture Singapore (Japanese) or hold Singapore to end of game (Commonwealth) Scoring sources: Capture of Singapore hex (Japanese major victory), Singapore held to final game turn (Commonwealth victory), Turn of Singapore's fall determines marginal/substantial/decisive victory levels

Source: Rulebook

Rules to know

The most useful rules for getting a first game right.

General

Unit counters display three values in Attack-Defense-Movement format.

Every combat unit counter shows three numeric values separated by hyphens (e.g., 8-6-6). The first number is the unit's Attack strength, the second is its Defense strength, and the third is its Movement allowance in hexes per turn. For example, a counter reading '8-6-6' has attack 8, defense 6, and movement 6. Reconnaissance and cavalry-type units (e.g., 7 Hussars, 3-1-12) have high movement allowances. Weaker garrison/volunteer units have lower values (e.g., 1-2-3 or 1-2-6).

General

Commonwealth forces include British, Indian, Australian, Malay, Volunteer, and special units.

Commonwealth counters are organized by formation: British (BRIT), Indian (IND), Australian (AUS), Malay (MALAY), Federated Malay States Volunteer Force, Straits Settlements Volunteer Force (marked 'S'), British Malaya, Gurkha, and Canadian (CAN) units. Special units include the 2 Royal Tank Regiment (armored, 3-1-12) and 7 Hussars (cavalry/recon, 3-1-12). Some counters carry Imperial Guard designations. Units are identified by their brigade/battalion number and parent division (e.g., '11 IND' = 11th Indian Brigade, '7 AUS' = 7th Australian Brigade).

General

Japanese counters include standard infantry and assault units marked 'JP'.

Japanese units are marked with 'JP' on their counters and include infantry and assault formations. Japanese counters also show Attack-Defense-Movement values. Some Japanese units carry the 'ASSAULT' designation, indicating enhanced assault capabilities. The Pulse counter and Assault counter track Japanese operational tempo during their turn.

Setup

Reinforcement units enter play on the game turn printed on their counter.

Many units have a turn number printed on their counter (visible in the counter manifest). These units are held off-map and enter play at the start of the indicated game turn, arriving at their designated entry hex or port. Commonwealth reinforcements arrive at various turns and include formations such as the 14 CAN, 3 South African, and additional British/Indian/Australian brigades. Japanese reinforcements similarly arrive on schedule. Units marked with hex coordinates (e.g., 0508, 1616) enter at those specific map hexes.

Turn structure

The Game Turn track records the current turn; each turn represents a fixed period of the campaign.

The Game Turn track (labeled 'TURN GAME' on the counter sheet) records which turn of the campaign is currently being played. The marker advances one space at the end of each complete round of play (both players having taken their turns). Reinforcements and special events are keyed to specific turn numbers.

Movement

A unit may move up to its Movement allowance in hexes per turn.

Each unit has a Movement allowance (the third number on its counter). During the movement phase, a unit may move through any number of hexes up to this limit, paying terrain costs as applicable. Units may not exceed their movement allowance in a single turn. High-mobility units like the 7 Hussars and 2 Royal Tank Regiment (movement 12) can cover much more ground than standard infantry (movement 6 or 8).

Restriction

A unit marked 'Blocked This Turn' may not move or attack until the marker is removed.

The 'Blocked This Turn' marker is placed on a unit to indicate it has been rendered temporarily inactive—it cannot move or conduct combat for the remainder of the current turn. The marker is removed at the start of the following turn. This restriction applies regardless of the unit's normal capabilities.

Special

The Port marker tracks control of key port facilities, affecting supply and reinforcement.

A dedicated Port marker ('PORT') on the counter sheet indicates port status. Ports are strategically vital for the Commonwealth player because reinforcements arrive by sea and supply lines depend on port access. If a Japanese unit captures a port hex, the corresponding port marker may be flipped or removed, disrupting Commonwealth reinforcement and supply.
Strategy briefing

Japanese Speed Strategy

The Japanese player should exploit high-movement units (especially Imperial Guard formations with 9-7-8 movement 8) to bypass Commonwealth roadblocks. The road network is critical — cutting road hexes isolates slower Commonwealth infantry (movement 6) who cannot redeploy in time.

Commonwealth Defensive Depth

The Commonwealth player should avoid committing Volunteer Force units (2-4-3, 1-2-3) to frontline combat against Japanese regulars. Use them only as rear-area screens or to hold secondary hexes, reserving Australian and Indian brigades (6-4-6 to 8-6-6) for main defensive lines.

Protecting Ports

The Commonwealth player must prioritize holding port hexes, especially Penang and Singapore's port, to ensure reinforcements arrive on schedule. If Penang falls early, the Penang Shipping Captured marker activates and may delay or reroute critical reinforcement convoys.

Tank Employment

The 2 Royal Tank Regiment (3-1-12) has movement 12 but defense only 1, making it lethal when exploiting breakthroughs but catastrophic if left in the path of a Japanese assault. Never use it as a lone defender; its attack value of 3 combined with infantry creates powerful combined-arms stacks.

Reinforcement Timing

Knowing when reinforcements arrive (as keyed to the Game Turn track) is critical for both players. The Commonwealth player should plan defensive lines that can hold until specific turn numbers when key reinforcements (e.g., Australian brigades, 14 CAN, Imperial Guard equivalents) arrive. The Japanese player should try to reach Singapore before these reinforcements tip the balance.

Blocking and Tempo

The Blocked This Turn marker is a valuable tool for disrupting opponent plans. A unit that becomes blocked loses its turn entirely. The Japanese Pulse/Assault system rewards aggressive tempo — each pulse spent on decisive combat is a pulse not wasted on peripheral actions.

Common questions and edge cases

Can the 2 Royal Tank Regiment (movement 12) move through a hex occupied by a Blocked unit?

The Blocked This Turn marker only affects the unit it is placed on — it cannot move or attack. Other friendly units may move through that hex normally, subject to stacking limits. The 2 Royal Tank Regiment's movement of 12 is unaffected by adjacent blocked units.

A Volunteer Force unit (2-4-3) and an Indian brigade (8-6-6) attack together. How is the combined attack calculated?

Combined attack strength is the sum of all attacking units' Attack values: 2 + 8 = 10 total attack. This is compared against the defending unit's total Defense strength to determine the odds ratio for the CRT. The Volunteer unit's low attack contributes minimally but still adds to the total.

If Penang is captured early, do Commonwealth sea reinforcements still arrive?

Capturing Penang activates the Penang Shipping Captured marker. Depending on scenario rules, this may redirect or delay Commonwealth reinforcements that would normally arrive through Penang's port. Reinforcements keyed to other port hexes are unaffected. Check the scenario entry hexes for each reinforcement counter.

A Japanese Imperial Guard unit (10-8-8) attacks a Commonwealth Volunteer unit (1-2-3). What is the odds ratio?

Attack 10 vs. Defense 2 = 5:1 odds, rounded down per standard CRT rules. This is one of the highest possible odds ratios and will almost certainly result in elimination of the defending Volunteer unit.

A unit marked with '~' (reduced step) suffers a step loss. What happens?

If the full-strength side is currently in play and suffers a step loss, flip the counter to the '~' reduced side. If the reduced side suffers another step loss, the unit is eliminated and placed in the Destroyed box.

Can the Kroh Column (starting at hex 0508) move away from its starting hex on Turn 1?

Yes. The hex coordinate on the counter (0508) indicates the setup hex only. Once play begins, the Kroh Column moves and fights like any standard combat unit, subject to its movement allowance and the current player's movement phase.

Once Z Force is destroyed, can it ever return to play?

No. Z Force represents a one-time historical asset. Once the Destroyed result is applied and it is placed in the Destroyed box, it is permanently removed from play. There is no reconstitution rule for Z Force.

In what sequence does the Japanese player use Pulse and Assault markers?

The Japanese player activates units by pulse during their turn. The Assault marker is placed when conducting a dedicated assault combat action (typically against a fortified position or across a defended river/strait). The Pulse tracks the number of activations taken; once all pulses are expended, the Japanese turn ends and the Commonwealth player takes their turn.

Ask About This Game

Similar games